The holiday season is almost here, which means your natural gas appliances — especially those in your kitchen — will soon be working overtime. Whether you’re preparing a Thanksgiving feast for family, baking your famous Christmas cookies or hosting guests for a New Year’s Eve party, lots of cooking is sure to be on the agenda this holiday season. For safety’s sake and energy efficiency, take a few minutes now to get your natural gas stove ready.
Walton Gas offers these hacks using inexpensive supplies, which you probably already have in your cabinet, for an easy and affordable cleanup of your gas appliances.
SAFETY
Before cleaning your stove, ensure that all nobs for the cooktop and oven are turned off. All burners and oven interior should be completely cooled before cleaning. It’s also a good idea to lift a window or turn on an exhaust fan to keep your kitchen well ventilated while cleaning.
A dirty, greasy cooktop may not light easily, can affect your cooking and presents a fire hazard — none of which you need at holiday time.
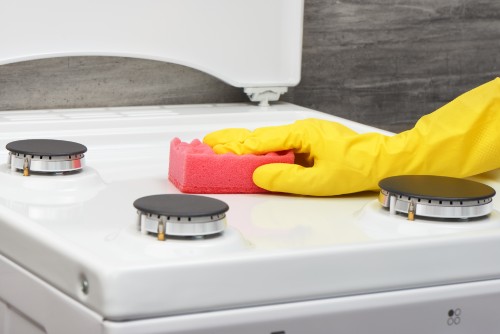
COOKTOP
Few kitchen appliances endure as much daily use as a gas cooktop. It gets covered with dirt, dust, food, liquid overflow, grease splatters and more. A dirty, greasy cooktop may not light easily, can affect your cooking and presents a fire hazard — none of which you need at holiday time.
Grates and burner caps
Hack #1: Vinegar-baking soda paste. Lift off grates and burner caps; pile them in a deep sink. Perform an initial wash in a slightly diluted solution of liquid dish detergent, using a non-abrasive sponge to remove the greasy film. Drain water from sink. Then, create a paste by combining one part vinegar and two parts baking soda with a few drops of dish soap. Coat the grates and caps with the paste. Let the mixture sit for at least 20 minutes before washing off the softened food with the sponge. Rinse thoroughly.
Hack #2: Ammonia soak. Remove grates and burner caps, place each in a separate, sealable plastic bag (or covered plastic dish) along with ¼ cup of household ammonia. Seal and let them sit overnight (at least 8 hours). In the morning, grime should slide right off of the pieces with a wash with a soapy sponge.
Set aside clean grates and burner caps to allow them dry while you clean the rest of the stovetop. Note that burner caps should be completely dry before replacing them to avoid damaging igniters.
Burner heads
Hack #3: Paper clip or safety pin to clear ports. After wiping down heads with a damp (not wet) cloth to remove food particles, use the pointed end of a paper clip or safety pin to remove food particles that can block gas flow from ignition ports (holes). Wipe away the freed particles with the damp cloth. Finish with a gentle scrub with vinegar to remove grease and stains. Caution: Take care to avoid getting the electric starters (which sit on top of the stove under and to the side of each burner) wet. If an electric starter gets wet, it may malfunction and have to be replaced.
Cooktop surface
Hack #4: Vacuum crumbs. If your vacuum is handy, use it to quickly suck up any loose crumbs or food particles on the cooktop surface.
Hack #5: Vinegar-baking soda paste (again!). To remove cooked-on messes, mix another batch of the vinegar-baking soda paste as noted above. Spread it on any dirty spots and let it sit for 15 minutes. Then, gently scrub away gunk with a soapy sponge. Use a dry, clean cloth to dry the surface before replacing the dry burner covers and grates.
Hack #6: Hot towel mask. Wet a dish towel and wring it out. Place the damp towel in the microwave and warm it for 30 seconds. Take care when removing the steaming towel from the oven. Place the hot towel over any spots with cooked on food. After the towel cools, cooked-on food should be loosened and easily scrubbed away.
Food caked onto your oven can increase cooking times,
reducing energy efficiency.
OVEN
Keeping gas appliances like your oven clean isn’t just a matter of good housekeeping, it’s a matter of home safety. Leftover food and grease in your oven can pose a fire risk. Plus, food caked onto your oven can increase cooking times, reducing energy efficiency.
Hack #7: Don’t use the self-cleaning feature. Though you may have a self-cleaning oven cycle, it’s not a good idea to use it the just before the holidays. Here’s why: Self-cleaning ovens use high heat to clean, creating a lot of smoke and odor that would be unpleasant for guests. The self-cleaning feature can also cause your oven to malfunction — not ideal when you have a turkey to roast and no time to call a repairman. Instead, substitute one of the holiday friendly cleaning hacks below. Save your self-cleaning cycle for after the holiday guests have gone home.
Hack #8: Ammonia pre-treatment. If your oven has a lot of cooked-on mess, pre-treat with ammonia before cleaning. Place 1/2 cup of ammonia in a shallow glass or pottery container in a cold oven overnight. The ammonia fumes will help loosen burned-on grease and food that can then be removed by other cleaning methods. Caution: Do not turn oven on while ammonia is inside.
Hack #9: Steam bath. Remove the racks and wipe or vacuum out any loose debris. Replace bottom rack and place a large metal baking dish filled with 1:1 vinegar and water. Set the oven to 450 degrees and let it run at that temperature for 20 minutes and up to an hour, letting the water bubble and steam. Turn off the oven, then carefully spray the inner surfaces with the water/vinegar solution (don’t burn yourself!). Close the door and let it stand at least 30 minutes. Wipe down the interior of the oven after it has had time to cool. Don’t wait too long, or the loosened stains and food bits will reattach to the oven’s interior.
Hack #10: Baking soda mask. Remove oven racks. Mix 1 cup of baking soda and 1 cup of water until it becomes a thick paste. Spread the mixture over the entire oven interior. Let the mixture sit for 12 hours. Spray the interior of the oven with vinegar. Wipe the oven clean.
Not every gas stove is the same. Every make and model is likely to have slightly different features, so it’s always a good idea to read manufacturer tips in your owner’s manual before tackling any appliance cleaning project.